Invoices
Point of Sale allows you to issue and print invoices for registered customers upon payment and retrieve all past invoiced orders.
Note
An invoice created in a POS creates an entry into the corresponding accounting journal configured in the POS settings.
Configuration
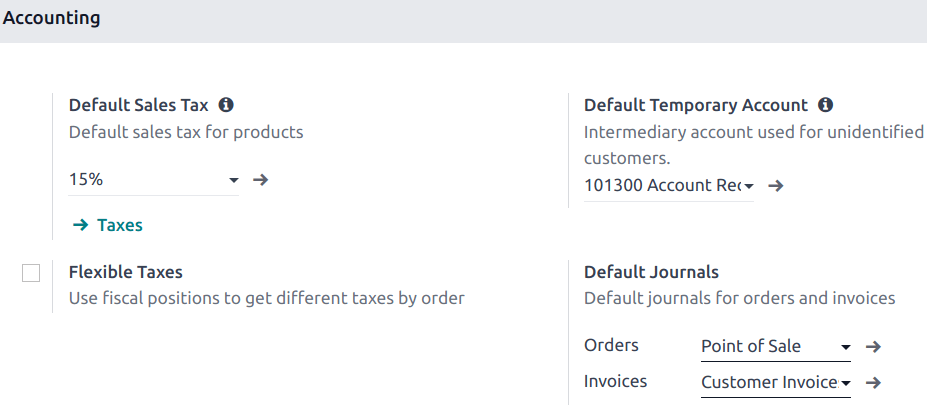
To define the default journals for a specific POS, go to the POS’ settings, scroll down to the Accounting section, and select the appropriate journals for Orders and Invoices under Default Journals.
Note
Specific journals can also be defined for each payment method.
Invoice a customer
To invoice a customer, first make sure a customer is set for the order. Then, upon processing the payment, click Invoice underneath the customer’s name to issue an invoice for that order.
Select the payment method and click Validate. The invoice is automatically issued and ready to be downloaded and/or printed.
Retrieve invoices
To retrieve the invoice of a POS order, follow these steps:
Go to .
Click the relevant invoiced order in the list.
On the order form, click the Invoice smart button.
Tip
Invoiced orders have the Fully Invoiced Invoice Status.
You can filter the list of orders to only display invoiced orders in the list: click the search bar and select the Invoiced filter.
QR codes to generate invoices
Customers can also request an invoice by scanning the QR code printed on their receipt. Upon scanning, they must fill in a form with their billing information and click Get my invoice. The invoice is then generated and available for download and the order’s status is updated to Fully invoiced.
To use this feature, enable QR codes on receipts by going to . Then, select the POS in the Point of Sale field, scroll down to the Bills & Receipts section, and enable Use QR code on ticket.