Import products
The Axis Sales app provides a template for importing products with categories and variants, which can be opened and edited with any spreadsheet software (Microsoft Excel, OpenOffice, Google Sheets, etc.).
When this spreadsheet is filled out correctly, it can be uploaded to the Axis database within minutes. By the end of the process, all the products and their variants are live within Axis and accessible in the product catalog.
Download template
To import products with categories and variants, the Import Template for Products must be downloaded. Once downloaded, the template can be adjusted and customized, and then uploaded into the Axis database.
To download the necessary import template, navigate to . On the Products page, click the (Action) icon in the upper-left corner.
From the drop-down menu, select the Import records option.
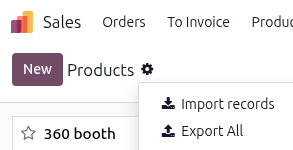
Selecting Import records displays a separate page with a Import Template for Products link to download the template.
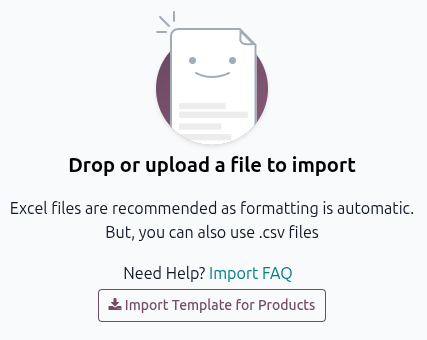
Once downloaded, open the spreadsheet file to customize it.
Customize product import template
When modifying the product import template, keep in mind the following:
Feel free to remove any columns that aren’t deemed necessary. But, it is recommended that the Internal Reference column remain.
While it is not mandatory, having a unique identifier (e.g.,
FURN_001) in the Internal Reference column for each product can be helpful in many cases. This can even be from previous software spreadsheets to ease the transition into Axis.For example, when updating imported products, the same file can be imported several times without creating duplicates, thus enhancing the efficiency and simplicity of imported product management.
Do not change the labels of columns that are meant to be imported. Otherwise, Axis won’t recognize them, forcing the user to map them manually on the import screen.
Feel free to add new columns to the template spreadsheet, if desired. However, to be added, those fields must exist in Axis. If Axis can’t match the column name with a field, it can be matched manually during the import process.
During the import of the completed template, Axis displays a page that shows all the elements of the newly configured product template spreadsheet, separated by File Column, Axis Field, and Comments.
To manually match a column name with a field in Axis, click the Axis Field drop-down menu next to the File Column that needs a manual adjustment, and select the appropriate field.

Import product template spreadsheet
After customizing the product template spreadsheet, return to the Axis product import page, where the template download link is found, and click the Upload File button in the upper-left corner.
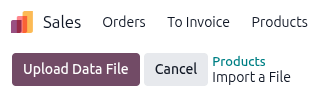
Then, a pop-up window appears, in which the completed product template spreadsheet file should be selected and uploaded to Axis.
After that, Axis displays a page that shows all the elements of the newly configured product template spreadsheet, organized by File Column, Axis Field, and Comments.
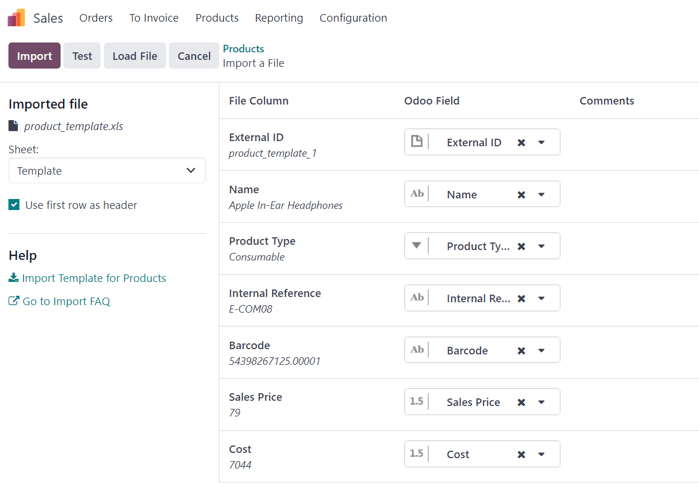
From here, the File Column can be manually assigned to an Axis Field, if necessary.
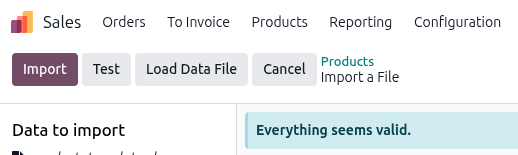
To ensure everything is appropriate and that all the columns and fields are aligned correctly, click the Test button in the upper-left corner.
If everything is lined up and applied correctly, Axis displays a blue banner at the top of the page, indicating that Everything seems valid.
If there are any errors, Axis displays a red banner at the top of the page with instructions on where to locate the specific issues and how to fix them.
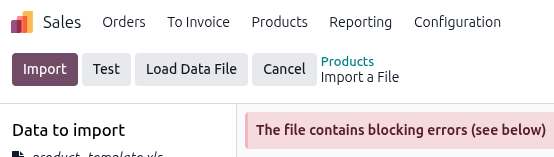
Once those errors are fixed, click Test again to ensure all necessary issues have been remedied appropriately.
If additional product template spreadsheets need to be uploaded, click the Load Data File button, select the desired template, then repeat the process.
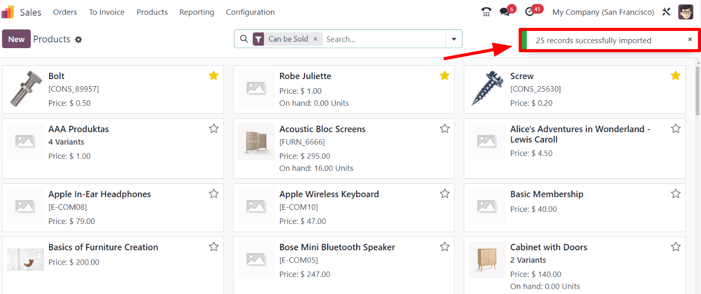
When everything is ready, click the Import button.
When clicked, Axis instantly imports those products and reveals the main Products page, with a pop-up message in the upper-right corner. This pop-up message informs the user how many products were successfully imported.
At this point, all the newly imported products are accessible and editable on the Products page.
Import relation fields, attributes, and variants
It’s important to note that an Axis object is always related to many other objects. For example, a product is linked to product categories, attributes, vendors, and related information. These links/connections are known as relations.
Note
To import product relations, the records of the related object must be imported first from their own list menu.
Relation fields
In Axis, product forms include several fields that can be modified and customized at any time. These fields are available on every tab of a product form. While these fields can be edited directly on the product form, they can also be modified via a product import.
As mentioned, relation fields of this nature can only be imported for products if they already exist in the database. For example, if a user attempts to import a product with a Product Type, it must be one of the preconfigured product types in the database (e.g., Tracked Product, Untracked, etc.).
To import information for a relation field on a product import template spreadsheet, add the name of the field as a column name/title on the spreadsheet. Then, on the appropriate product line, add the desired relation field option.
When all desired relation field information has been entered, save the spreadsheet, and import it to the database. Go to the . On the Product page click the (Action) icon and select .
Once the spreadsheet with the newly-configured relation field information has been uploaded, click Import, and Axis returns to the Products page.
Once the newly changed/modified products, complete with the new relation field information, have been imported and uploaded, that new information can be found on the Products page.
Attributes and values
Axis supports importing attributes and values for both already existing and newly imported products. Attributes and values must be uploaded through a separate spreadsheet or CSV file before they can be applied to other products.
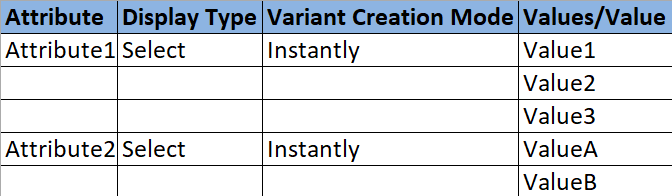
The column names/titles for the attributes and values spreadsheet should be: Attribute, Display Type, Variant Creation Mode, and Values / Value.
Attribute: name of the attribute (e.g.,
Size).Display Type: display type used in the product configurator. There are three display type options:
Radio: values displayed as radio buttons
Selection: values displayed in a selection list
Color: values denoted as a color selection
Variant Creation Mode: how the variants are created when applied to a product. There are three variant creation mode options:
Instantly: all possible variants are created as soon as the attribute and its values are added to a product.
Dynamically: each variant is created only when its corresponding attributes and values are added to a sales order.
Never: variants are never created for the attribute.
Note
The Variants Creation Mode cannot be changed once the attribute is used on at least one product.
Values/Value: values pertaining to the corresponding attribute. If there are multiple values for the same attribute, they need to be on separate lines in the spreadsheet.
Once the desired attributes and values have been entered and saved in the spreadsheet, it’s time to import and upload the spreadsheet to Axis. To do that, navigate to . On the Attributes page, click the (Action) icon and select .
Once the spreadsheet with the newly-configured attributes and values has been uploaded, click Import, and Axis returns to the Attributes page. That’s where the newly added attributes and values can be found and edited, if necessary.
As mentioned previously, when attributes and values have been added to the Axis database, they can be used for existing or imported products.
Product variants
When product attributes and values are configured in the database, they can be used in product import spreadsheets to add more information and detail imported products.
To import products with product attributes and values, the product import template spreadsheet must be configured with specific Product Attributes / Attribute, Product Attributes / Values, and Name columns.
There may be other columns as well, but these are required to import products with specific variants properly.

Name: product name
Product Attributes / Attribute: name of attribute
Product Attributes / Values: values pertaining to the corresponding attribute
Tip
To import multiple values, separate them with a single comma, not a comma followed by a
space, in the product import template spreadsheet (e.g., furniture,couch,home).
When the desired products and product variants have been entered and saved in the spreadsheet, it is time to import them into Axis. To do that, navigate to . On the Products page, click the (Action) icon and select :.
Once the spreadsheet with the newly-configured products and product variants has been uploaded, click Import, and Axis returns to the Products page. That’s where the newly-added products can be found.
To view and modify the attributes and variants on any products, select the desired product from the Products page, and click the Attributes & Variants tab.
Example
A furniture company wants to import their existing product list into Axis Sales app. Several of the company’s products have different variations:
Customizable Desk
Color: White, Black
Legs: Wood, Steel
Stool
Color: Green, Navy
Seat: Leather, Wood
In the template, the Customizable desk and Stool are in the Name column with Color, Legs, and Seat in the Product Attribute/Attribute column. White, black, wood, steel, and leather are all in the Product Attribute/Value column.

See also